Are you ready to give your space a fresh new look by replacing your old vinyl flooring? If so, you’re in the right place! In this beginner-friendly guide, we’ll walk you through the step-by-step process of removing vinyl flooring. Don’t worry if you’re new to DIY projects – we’ve got all the information you need to get started safely and confidently. Let’s dive in and learn how to tackle this task like a pro!
Tools and Equipment Needed
Before you start removing your vinyl flooring, these are the essentials we recommend to gather to complete the job the best you can. Here’s why we these tools are necessary.
- Utility Knife: A sharp utility knife will be your primary tool for cutting through the vinyl flooring and any adhesive underneath.
- Floor Scraper: A floor scraper with a long handle will help you pry up the vinyl flooring from the subfloor. Opt for a scraper with a replaceable blade for efficiency.
- Heat Gun or Hair Dryer: Applying heat to the vinyl flooring softens the adhesive, making it easier to remove. A heat gun or hair dryer can be used for this purpose. Heat guns are more favorable however if you only have a hairdryer thats fine too.
- Putty Knife or Paint Scraper: A putty knife or paint scraper is useful for lifting and scraping away any adhesive residue left on the subfloor.
- Pry Bar: A pry bar can help you lift stubborn sections of vinyl flooring, especially around edges and corners.
- Safety Gear: It’s important to prioritise safety during this project. Wear safety goggles to protect your eyes from debris and gloves to shield your hands. Additionally, a dust mask or respirator will prevent you from inhaling dust and fumes.
- Knee Pads: Since you’ll be spending a lot of time kneeling on the floor, invest in a pair of knee pads to cushion and protect your knees from discomfort or injury.
- Trash Bags or Containers: Have trash bags or containers nearby to dispose of the removed vinyl flooring and any adhesive residue.
- Optional: Floor Adhesive Remover: If the adhesive is particularly stubborn, you may need a commercial floor adhesive remover to soften and dissolve it effectively.
Make sure to have all these tools and equipment readily available before you begin the vinyl flooring removal process. Having the right tools will make the job easier and more efficient.
Methods for Removing Vinyl Flooring
Removing vinyl flooring can be a labor-intensive process, but with the right methods, it can be done efficiently. Here are two effective methods for removing vinyl flooring:
Method 1: Heat Application and Peeling
Start by heating the vinyl using a heat gun or hair dryer, keeping the tool moving to avoid damaging the subfloor. Once the vinyl is warm, gently lift the edge with a putty knife or paint scraper and peel it back at a 45-degree angle, applying more heat as needed to soften the adhesive.
Continue this process, working in small sections and applying heat to loosen stubborn adhesive. After all the vinyl is removed, you may find adhesive residue on the subfloor. Use a putty knife or floor scraper to scrape away the residue, applying heat to soften it if necessary.
Finally, clean the subfloor thoroughly with mild detergent and warm water to remove any remaining debris.
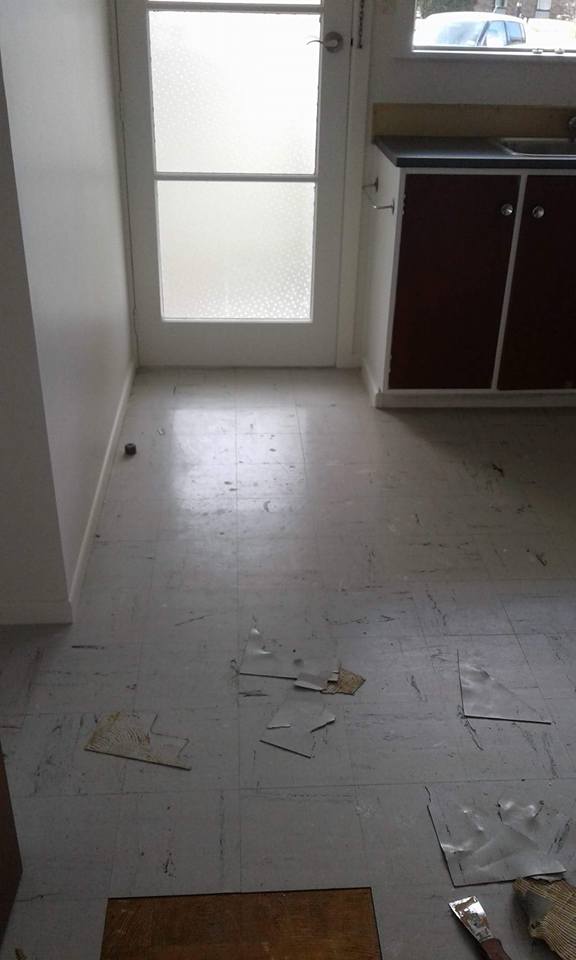
Method 2: Cutting and Scraping
Score the vinyl flooring using a utility knife. Cut along the seams or edges to create manageable strips for easier removal.
Lift and pry up the sections of flooring with a floor scraper or pry bar. Work from one end of the room to the other, gradually removing the vinyl in small sections.
Scrape away the adhesive residue from the subfloor using a putty knife or paint scraper, being careful not to damage the subfloor.
Clean the subfloor thoroughly with mild detergent and warm water to remove any remaining debris.
Precautions to Prevent Damage to Subfloor
- Inspect Subfloor: Before you begin removing the vinyl flooring, thoroughly inspect the subfloor for any signs of damage, such as water damage, rot, or uneven areas. Addressing any issues beforehand will prevent further damage during the removal process.
- Use Caution: When removing vinyl flooring, it’s important to exercise caution to avoid damaging the subfloor. Avoid using excessive force or sharp tools that could gouge or scratch the surface. Instead, work methodically and patiently to lift the vinyl without causing damage to the subfloor.
- Protect Subfloor from Moisture: Moisture can weaken the subfloor and compromise its integrity. If you encounter moisture during the removal process, take steps to dry the subfloor thoroughly before proceeding with the installation of new flooring.
- Repair Damage Quickly: If you discover any damage to the subfloor, such as cracks, holes, or rot, it’s essential to repair it promptly. Ignoring damaged areas can lead to further issues down the line and affect the stability of your new flooring. Use appropriate repair materials and techniques to ensure a smooth and level surface for the installation of new flooring.
In conclusion
Removing vinyl flooring requires careful planning, the right tools, and a methodical approach. Following the steps outlined in this guide, you can safely and effectively remove old vinyl flooring without causing damage to the subfloor.
Remember to inspect the subfloor beforehand, use caution during the removal process, and promptly repair any damage encountered.
With proper precautions and attention to detail, you’ll be well on your way to preparing the subfloor for new flooring installation.